Install TOMCAT Web Server
LAMP is a combination of operating system and open-source software stack. The acronym LAMP is derived from first letters of Linux, Apache HTTP Server, MySQL database, and PHP/Perl/Python.
Install Apache
Apache is an open-source multi-platform web server. It provides a full range of web server features including CGI, SSL and virtual domains.
To install Apache, enter the following command from your terminal:
# yum install httpd -y
Start the Apache service and let it to start automatically on every reboot:
# service httpd start
# chkconfig httpd on
Allow Apache server default port 80 through your firewall/router if you want to connect from remote systems. To do that, edit file /etc/sysconfig/iptables,
# vi /etc/sysconfig/iptables
Add the following lines.
[…]
-A INPUT -m state –state NEW -m tcp -p tcp –dport 80 -j ACCEP
[…]
Restart iptables:
# service iptables restart
Test Apache:Open your web browser and navigate to http://localhost/ or http://server-ip-address/.
Install MySQL
MySQL is an enterprise class, open source, world’s second most used database. MySQL is a popular choice of database for use in web applications, and is a central component of the widely used LAMP open source web application software stack.
To install MySQL, enter the following command:
# yum install mysql mysql-server -y
Start the MySQL service and make to start automatically on every reboot.
# service mysqld start
# chkconfig mysqld on
Setup MySQL root password
By default, mysql root user doesn’t has password. To secure mysql, we have to setup mysql root user password.
# mysql_secure_installation
NOTE: RUNNING ALL PARTS OF THIS SCRIPT IS RECOMMENDED FOR ALL MySQL SERVERS IN PRODUCTION USE! PLEASE READ EACH STEP CAREFULLY!
In order to log into MySQL to secure it, we’ll need the current password for the root user. If you’ve just installed MySQL, and you haven’t set the root password yet, the password will be blank, so you should just press enter here.
Enter current password for root (enter for none): ## Press Enter ## OK, successfully used password, moving on…
Setting the root password ensures that nobody can log into the MySQL root user without the proper authorisation.
Set root password? [Y/n] ## Press Enter ##
New password: ## Enter new password ##
Re-enter new password: ## Re-enter new password ## Password updated successfully!
Reloading privilege tables..
… Success!
By default, a MySQL installation has an anonymous user, allowing anyone to log into MySQL without having to have a user account created for them. This is intended only for testing, and to make the installation go a bit smoother. You should remove them before moving into a production environment.
Remove anonymous users? [Y/n] y ## Press Enter ##
… Success!
Normally, root should only be allowed to connect from ‘localhost’. This ensures that someone cannot guess at the root password from the network.
Disallow root login remotely? [Y/n] ## Press Enter ##
… Success!
By default, MySQL comes with a database named ‘test’ that anyone can access. This is also intended only for testing, and should be removed before moving into a production environment.
Remove test database and access to it? [Y/n] ## Press Enter ##
Dropping test ..
… Success!
Removing privileges on test ..
… Success!
Reloading the privilege tables will ensure that all changes made so far will take effect immediately.
Reload privilege tables now? [Y/n] y ## Press Enter ##
… Success! Cleaning up…
Install PHP
PHP (recursive acronym for PHP: Hypertext Preprocessor) is a widely used open-source general purpose scripting language that is especially suited for web development and can be embedded into HTML.
Install PHP with following command:
# yum install php -y
Test PHP
Create a sample “testphp.php” file in Apache document root folder and append the lines as shown below:
# vi /var/www/html/testphp.php
Add the following lines. Restart httpd service:
# service httpd restart
Navigate to http://server-ip-address/testphp.php. It will display all the details about php such as version, build date and commands etc.
If you wanna to get MySQL support in your PHP, you should install “php-mysql” package. If you want to install all php modules just you use the command “yum install php*”
[root@server ~]# yum install php-mysql -y
Now open the phptest.php file in your browser using http://ip-address/testphp.php or http://domain-name/testphp.php. Scroll down and you will see the mysql module will be presented there.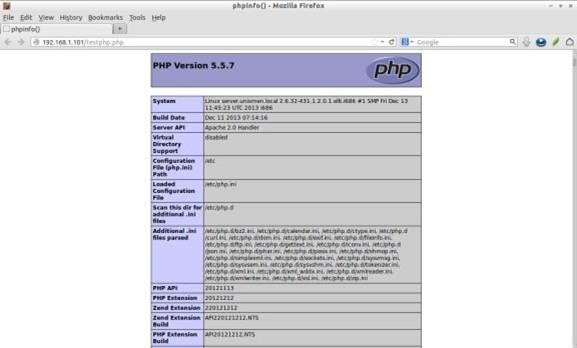
Install MySQL Database Server
MySQL is a widely used open source database server on most Linux servers and can very well integrate to PHP and Apache server on CentOS/RHEL.
yum install mysql mysql-server mysql-devel
If you attempt to type mysql in command prompt, you will be getting this error.
ERROR 2002 (HY000): Can’t connect to local MySQL server through socket ‘/var/lib/mysql/mysql.sock’
This is because you are not running the mysqld daemon before launching the mysql client. The file /var/lib/mysql/mysql.sock will be automatically created upon running the first instance of mysql.
To fix:
First start the mysql daemon, then type mysql:
/etc/init.d/mysqld start mysql
Changing MySQL Root Password
By default the root password is empty for the mysql database. It is a good idea to change the mysql root password to a new one from a security point of view.
mysql> USE mysql;
mysql> UPDATE user SET Password=PASSWORD(‘newpassword’) WHERE user=’root’;
mysql> mysql> FLUSH PRIVILEGES;
Once done, check by logging in:
mysql -u root -p
Enter Password: <your new password>
then open a browser and type servers ip address like 172.16.18.24/or Localhost then run the php programs in the following link: home/var/www/html/sample.php
Install TOMCAT web server
Procedure:
Visit the Apache Website http://tomcat.apache.org to get the latest information. On the home page, click the link Tomcat 5.x under the heading Download.
scroll down the page until you find the heading 5.5.23, under which you will find sub heading Binary Distributions.(for ex zip,exe,tar). But the choice of download may depend up on your operating system.
If you are using windows o.s download either the .zip file(apache-tomcat- 5.5.23.zip) or the .exe file(apache-tomcat-5.5.23.exe)
If you are using unix based o.s download the .tar.gz file(apache-tomcat- 5.5.23.tar.gz)
Installing Under Windows O.S :-
If you have downloaded the .zip version of Tomcat, simply extract the content using a file extractor tool (such as winzip or winrar) to the c:\drive.
(After the extraction process is completed, you will find a directory named apache-tomcat-5.5.23 and a no.of subdirectories under it including a couple of files such as RUNNING.TXT, NOTICE.FILE, RELEASE-NOTES.FILE and LICENSE.FILE .)
Note 1 : you may also use the Jar command that comes with JDK, to extract the content. The command is Jar -xvf apache-tomcat-5.5.23.zip
Note 2 : if you wish , you can rename the directory apache-tomcat-5.5.23 with a convenient and shorter name as tomcat 5.5
Note 3 : directory containing tomcat(c:\apache-tomcat-5.5.23) is called CATALINA_HOME, and if you want tomcat to work correctly set this variable. if you have download the .exe version, installation is very easy. Execute the apache-tomcat.5.5.23.exe either by selecting open or double-click it![]()
3.The following window would appear on your desktop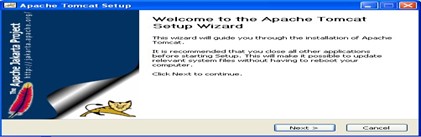
4.During the installation you may have to make several choices such as Choosing the features of tomcat :- you have the options to select Normal, full , minimum or custom, select one among them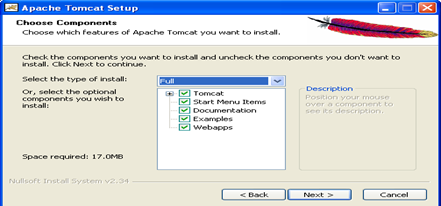
5.choosing the installation location : default location would be
c:\program files\apache software foundation\tomcat 5.5 (CATALINA_HOME) of course you may also choose the location you want.
6.choosing the port number, username , and password : Default port number is 8080, of course you may also choose the port number of your choice, provide user name and password
7.choosing the JVM : Default JVM would be automatically selected, if you have multiple JVMs installed on your system, provide a suitable path here.
8.click on Install button, then you will see the following windows screen :-
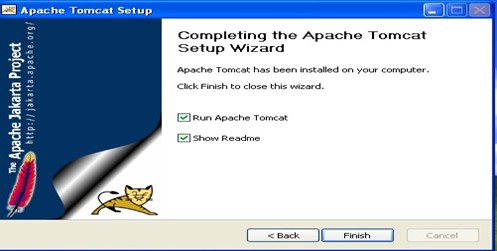
9.finally you will see the following window if the installation is successfully completed